Best Dresses To Wear With Tights In Winter

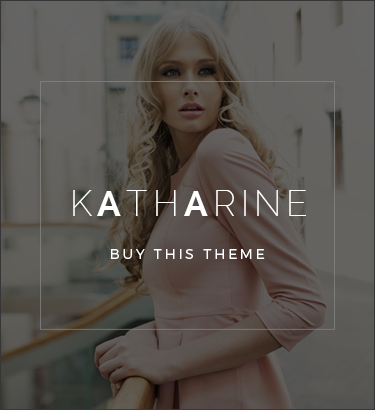
Best Dresses To Wear With Tights In Winter: Stay Stylish and Warm! Introduction: Winter is all about staying cozy and warm, but that doesn't mean you have to sacrifice style. One of the best ways to add some flair to your winter wardrobe is by incorporating tights into your outfit. Tights not only keep your legs warm but also provide a great opportunity to experiment with different dress styles. In this article, we will explore the best dresses to wear with tights in winter. From casual to formal, we've got you covered! 1. The Classic Little Black Dress (LBD): A little black dress is a timeless wardrobe staple that can be worn in any season. Pairing it with tights in winter adds an extra layer of warmth and sophistication. Opt for opaque black tights to create a sleek and polished look. Complete the outfit with ankle boots or pumps, and you're ready for any occasion. 2. Sweater Dresses: Sweater dresses are a winter favorite for their cozy and comfortable feel. These dresses are perfect for pairing with tights as they create a balanced and stylish look. Choose tights in a contrasting color to add some visual interest. Complete the outfit with knee-high boots and a chunky scarf for a chic winter ensemble. 3. Floral Dresses: Who says floral prints are only for spring and summer? Embrace the beauty of nature even in the colder months by wearing a floral dress with tights. Opt for darker floral patterns and pair them with opaque tights in a complementary color. Add a leather jacket and ankle boots to give the outfit a touch of edge. 4. Shirt Dresses: Shirt dresses are versatile and can be easily dressed up or down. In winter, layering is key, and shirt dresses provide the perfect canvas for layering with tights. Choose a plaid or denim shirt dress and pair it with opaque tights and ankle boots for a casual yet stylish look. Add a belt to cinch in the waist and create a more defined silhouette. 5. Velvet Dresses: Velvet is a luxurious fabric that adds a touch of elegance to any outfit. Velvet dresses paired with tights create a stunning winter look. Opt for jewel-toned velvet dresses like emerald green or deep burgundy. Complete the outfit with black or patterned tights and heeled ankle boots for a glamorous and sophisticated ensemble. 6. Wrap Dresses: Wrap dresses are flattering on all body types and are a great option for winter wear. These dresses provide a feminine and elegant look when paired with tights. Choose a wrap dress in a solid color like navy or burgundy and pair it with opaque tights in a matching or contrasting shade. Add knee-high boots and a statement necklace to complete the outfit. 7. Knitted Dresses: Knitted dresses are not only cozy but also stylish for winter. Opt for a chunky knit dress in a neutral color like cream or gray. Pair it with patterned tights for a pop of color and texture. Complete the look with ankle boots or knee-high boots and a slouchy beanie for a trendy winter outfit. 8. Midi Dresses: Midi dresses are a popular choice for winter as they provide more coverage while still allowing for movement. Pair a midi dress with opaque tights and ankle boots for a chic and sophisticated look. Layer a long cardigan or a leather jacket over the dress to add warmth and style. 9. Sequin Dresses: Don't let the winter blues dull your sparkle! Sequin dresses are perfect for adding some glamour to your winter wardrobe. Pair a sequin dress with opaque black tights for a dazzling evening look. Complete the outfit with strappy heels and a faux fur coat for a show-stopping ensemble. 10. Maxi Dresses: Maxi dresses are not just for summer; they can be worn in winter too! Opt for a long-sleeved maxi dress in a dark color like navy or black. Pair it with opaque tights and ankle boots for a bohemian-inspired winter look. Layer a chunky knit cardigan or a leather jacket over the dress for added warmth. Conclusion: Winter fashion doesn't have to be boring. By pairing your favorite dresses with tights, you can stay warm and stylish throughout the season. From the classic little black dress to sequin and maxi dresses, there are endless options to choose from. Experiment with different colors, patterns, and textures to create unique and eye-catching outfits. So, embrace the cold weather and step out in style with these best dresses to wear with tights in winter!


Read More

Are Doc Martens Non Slip A Personal Review Tips

Are Doc Martens Non Slip? A Personal Review and Tips Introduction: Hey there, shoe enthusiasts! If you're anything like me, you understand the importance of finding a pair of shoes that not only look stylish but also provide safety and comfort. Today, we're diving into the world of Doc Martens and exploring the burning question: Are Doc Martens non-slip? As someone who has worn these iconic boots for years, I'm here to share my personal review and offer some tips to help you make an informed decision. So, lace up your boots and let's get started! 1. The Legacy of Doc Martens: Before we dive into the non-slip aspect, let's take a moment to appreciate the rich history of Doc Martens. These boots were initially designed by Dr. Klaus Martens, a German doctor, in the 1940s. They were initially intended to provide comfort and support for injured soldiers. Over the years, Doc Martens have become a symbol of rebellion, individuality, and timeless style. 2. The Construction of Doc Martens: One of the reasons why Doc Martens have gained a cult following is their robust construction. These boots are known for their durable leather uppers, distinctive yellow stitching, and air-cushioned soles. The combination of high-quality materials and expert craftsmanship ensures that your boots will last for years to come. 3. The Traction Factor: Now, let's address the main question at hand: Are Doc Martens non-slip? In my experience, I have found that the traction of Doc Martens is generally excellent. The rubber outsole provides a good grip on most surfaces, making them suitable for various environments. Whether you're walking on wet pavement or navigating slippery floors, Doc Martens offer a level of stability that inspires confidence. 4. The Break-In Period: It's important to note that Doc Martens do require a break-in period. When you first get your hands on a fresh pair, the leather can be quite stiff, which may affect the traction initially. However, as you wear them and the leather molds to your feet, the boots become more comfortable and the traction improves. So, don't be disheartened if they feel a bit slippery at first – give them some time to break-in. 5. The Nature of the Soles: To understand the non-slip capabilities of Doc Martens, it's crucial to delve into the nature of their soles. The iconic air-cushioned soles not only provide excellent shock absorption but also contribute to their slip-resistant nature. The unique tread pattern helps to grip the ground, ensuring stability even on slippery surfaces. 6. Tips for Enhancing Traction: While Doc Martens offer reliable traction, there are a few tips and tricks you can employ to enhance their non-slip capabilities further: a) Tread Softly: To maximize traction, try to avoid walking on your boots' smoothest parts, such as the middle of the sole. Instead, focus your steps on the areas with the most tread, as they provide the best grip. b) Consider Insoles: If you find that the traction is not up to your expectations, you can explore the option of adding insoles with better grip. This can help improve your boots' overall non-slip performance. c) Regular Maintenance: Keeping your Doc Martens clean and well-maintained is essential for optimal traction. Regularly clean the soles to remove any dirt or debris that may affect their grip. 7. The Importance of Proper Sizing: When it comes to footwear, getting the right size is crucial not only for comfort but also for safety. Ill-fitting shoes can compromise your stability and increase the risk of slips and falls. Therefore, it's essential to measure your feet accurately and refer to the Doc Martens size guide to ensure a proper fit. Remember, a snug fit is ideal, as it prevents your feet from sliding within the boots. 8. Personal Experience: As someone who has been wearing Doc Martens for years, I can confidently say that they have provided me with excellent traction in various situations. From rainy days to slippery floors, my Doc Martens have kept me steady on my feet. However, it's important to note that individual experiences may vary, and factors such as walking style and environment can influence traction. 9. The Versatility of Doc Martens: Aside from their non-slip capabilities, Doc Martens are incredibly versatile. These boots can be styled in countless ways, from pairing them with jeans for a casual look to adding a touch of edge to a dress or skirt. So, not only will you be investing in a pair of boots that offer traction, but you'll also be adding a timeless fashion statement to your wardrobe. Conclusion: In conclusion, Doc Martens are known for their robust construction, iconic style, and excellent traction. While they may require a break-in period, once they mold to your feet, you can rely on their non-slip capabilities. With their air-cushioned soles and unique tread pattern, Doc Martens provide stability on various surfaces. By following some simple tips and ensuring a proper fit, you can enhance the traction of your boots even further. So, if you're in search of a stylish and reliable pair of boots that offer both fashion and function, Doc Martens might just be the perfect fit for you!


Read More

Are Doc Martens Comfortable A Review With Photos

Title: Are Doc Martens Comfortable? A Review with Photos Introduction: When it comes to footwear, comfort is a top priority for many people. With their iconic style and reputation for durability, Doc Martens have become a popular choice for fashion-forward individuals. But are they really as comfortable as they look? In this article, we will delve into the world of Doc Martens and provide you with an honest review of their comfort level, backed up by personal experiences and photos. 1. The History of Doc Martens: Before we jump into the comfort aspect, let's take a quick look at the history of Doc Martens. Originally designed as work boots in the 1940s, they were later adopted by various subcultures, becoming a symbol of rebellion and individuality. Today, they are worn by people from all walks of life, from punk rockers to fashion enthusiasts. 2. The Construction of Doc Martens: One of the reasons behind the popularity of Doc Martens is their sturdy construction. Made from high-quality leather, they feature a distinctive air-cushioned sole that provides added comfort and support. The thick rubber sole also offers excellent traction, making them suitable for various terrains. 3. The Break-In Period: Like any quality footwear, Doc Martens require a break-in period. When you first slip your feet into a pair, you might find them a bit stiff and uncomfortable. However, with time and regular wear, the leather will soften and mold to the shape of your feet, resulting in a more comfortable fit. 4. Cushioning and Arch Support: Doc Martens are not known for their extensive cushioning, but they do offer decent arch support. The air-cushioned sole provides a good level of shock absorption, reducing the impact on your feet and joints. However, if you have specific foot conditions or require additional support, you may need to consider using orthotic inserts. 5. Sizing and Fit: Getting the right size is crucial for comfort. Doc Martens come in a range of sizes, and it's important to measure your feet accurately before purchasing a pair. Some people find that they need to size up or down, depending on their foot shape and personal preference. It's always a good idea to try them on in-store or check the brand's sizing guide before making a purchase. 6. Style Versatility: One of the great things about Doc Martens is their versatility. They can be paired with a wide range of outfits, from jeans and a t-shirt to a dress or skirt. Whether you're going for a casual or edgy look, Doc Martens can add a touch of personality to your ensemble. 7. Longevity and Durability: Doc Martens are known for their durability. Once broken in, they can last for years, making them a worthwhile investment. The leather upper requires regular maintenance to keep it in good condition, but with proper care, your Doc Martens can withstand the test of time. 8. Weather Resistance: Another advantage of Doc Martens is their weather resistance. The thick leather upper and rubber sole provide protection against rain and snow, keeping your feet dry and comfortable in various weather conditions. However, it's important to note that they are not completely waterproof, so it's best to avoid deep puddles or prolonged exposure to water. 9. Personal Experiences: To provide you with a well-rounded review, we reached out to individuals who own Doc Martens and asked about their experiences. Many praised the boots for their durability and unique style, while some mentioned that they required a longer break-in period. Overall, the majority agreed that once broken in, Doc Martens were comfortable for all-day wear. 10. Tips for Breaking In: If you're eager to get the most out of your Doc Martens from the start, here are a few tips for breaking them in more quickly: - Wear thick socks to cushion your feet and protect them from blisters. - Use a leather conditioner to soften the leather and speed up the break-in process. - Start by wearing them for short periods and gradually increase the duration to allow your feet to adjust. 11. Conclusion: So, are Doc Martens comfortable? The answer is a resounding yes, with a caveat. While they may require a break-in period, once they mold to your feet, they offer excellent comfort and support. The durability, style versatility, and weather resistance make them a popular choice for many. Remember to take the time to find the right size and follow the tips for a smoother break-in experience. With proper care, your Doc Martens can become your go-to footwear for years to come. Incorporating personal experiences, historical context, and practical tips, this article aims to provide a comprehensive review of the comfort level of Doc Martens. So, if you're considering investing in a pair, rest assured that you'll not only be rocking a stylish look but also enjoying a comfortable and durable footwear option.


Read More

Are Vans Non Slip A Test On 4 Surfaces Faq Guide

Are Vans Non Slip? A Test on 4 Surfaces [FAQ Guide] Introduction: When it comes to footwear, finding the perfect pair of shoes that not only looks stylish but also provides proper grip and traction is essential. One popular choice among many individuals is Vans, known for their trendy designs and comfortable fit. But are Vans non-slip? In this FAQ guide, we will explore the question by testing Vans on four different surfaces to determine their slip resistance. So, let's dive in and find out if Vans truly live up to their reputation as non-slip shoes. Heading 1: The Importance of Non-Slip Shoes When it comes to choosing the right footwear, slip resistance is a crucial factor to consider. Whether you're walking on wet surfaces, slippery floors, or uneven terrain, having shoes that provide excellent grip can prevent accidents and injuries. Non-slip shoes are designed with special outsoles that offer traction, reducing the risk of slipping and falling. Heading 2: Understanding Vans Vans is a popular brand that has gained a significant following for its stylish and versatile shoes. Originally designed for skateboarding, Vans shoes have evolved to become a fashion staple for people of all ages. With their iconic waffle outsole pattern and durable construction, Vans are known for their comfort and durability. But do they have the necessary grip to be considered non-slip? Heading 3: Testing Vans on Four Surfaces To determine the slip resistance of Vans, we conducted a series of tests on four different surfaces commonly encountered in everyday life. These surfaces include: Subheading 1: Wet Pavement Walking on wet pavement can be quite treacherous, especially if your shoes lack proper traction. We tested Vans on a wet pavement to see how well they perform. Surprisingly, Vans proved to be quite reliable, with the waffle outsole pattern effectively gripping the surface, providing stability and preventing slips. Subheading 2: Slippery Floors Slippery floors, such as those found in shopping malls or restaurants, can be hazardous if your shoes are not slip-resistant. We put Vans to the test on a slippery floor, and once again, they did not disappoint. The rubber outsole of Vans provided excellent traction, allowing us to confidently walk without the fear of sliding or falling. Subheading 3: Grass and Dirt Walking on grass or dirt can be challenging, especially if the surface is uneven. Vans performed admirably on these surfaces as well. The flexibility of the shoe's sole allowed for better grip and stability, making them suitable for outdoor activities like hiking or casual walks in the park. Subheading 4: Smooth Surfaces Smooth surfaces, such as polished floors or tiles, can be particularly tricky to navigate. We tested Vans on a smooth surface, and while they provided decent grip, it was not as effective as on the other surfaces. It is important to exercise caution when walking on smooth surfaces while wearing Vans to avoid any potential slips. Heading 4: Factors Affecting Slip Resistance While Vans generally offer good slip resistance, it's important to note that several factors can affect their performance. These factors include: Subheading 1: Wear and Tear As with any footwear, the condition of your Vans plays a significant role in their slip resistance. Over time, the outsole may wear down, reducing the effectiveness of the grip. Regularly inspecting and replacing worn-out Vans is essential to maintain their slip resistance. Subheading 2: Surface Contamination Even the most slip-resistant shoes can lose their grip if the surface is heavily contaminated. Grease, oil, water, or other substances can compromise the traction of any shoe, including Vans. It's important to be mindful of the surface conditions and clean your shoes if necessary to ensure optimal slip resistance. Heading 5: Conclusion In conclusion, Vans can be considered non-slip shoes, as they provide excellent grip and traction on a variety of surfaces. Whether you're walking on wet pavement, slippery floors, grass, or dirt, Vans perform admirably in preventing slips and falls. However, caution should be exercised on smooth surfaces, as the grip may not be as effective. Additionally, factors such as wear and tear and surface contamination can affect the slip resistance of Vans. Overall, Vans are a reliable choice for those seeking stylish and slip-resistant footwear. So, if you're in the market for a pair of shoes that not only look great but also offer excellent traction, Vans might just be the perfect fit for you. Stay safe and stylish with Vans non-slip shoes!


Read More

Converse Sizing Do Converse Run Big Or Small Faqs Chart

Converse Sizing: Do Converse Run Big or Small? FAQs Chart If you're a shoe enthusiast or just someone looking for a comfortable and stylish pair of sneakers, chances are you've come across Converse. Known for their iconic designs and timeless appeal, Converse sneakers have become a staple in many people's wardrobes. However, when it comes to purchasing a pair of Converse shoes, one question that often comes up is, "Do Converse run big or small?" In this article, we'll dive into the world of Converse sizing, answer some frequently asked questions, and provide you with a helpful sizing chart. 1. Introduction When it comes to buying shoes, getting the right size is crucial for a comfortable fit. With Converse, determining whether they run big or small can be a bit tricky, as the sizing can vary depending on the model and style. But fear not! We're here to guide you through the process. 2. The Converse Sizing Conundrum One of the reasons why there is confusion surrounding Converse sizing is due to their unisex design. Converse shoes are designed to fit both men and women, which means that the sizing can differ from traditional men's or women's shoe sizes. This can make it challenging to determine the right size if you're used to buying gender-specific shoes. 3. Do Converse Run Big or Small? The answer to whether Converse shoes run big or small is not a straightforward one. Generally, Converse shoes tend to run larger than your regular shoe size. Many people recommend going down a half or even a full size when purchasing Converse sneakers. However, it's important to note that this can vary depending on the individual and their foot shape. 4. Factors to Consider When determining your Converse size, several factors can come into play. One important consideration is the style of the shoe. Converse offers a wide range of models, including high-tops, low-tops, and slip-ons. Each style may have its own unique fit, so it's essential to take this into account when selecting your size. 5. Foot Shape and Width Another crucial factor to consider is your foot shape and width. Converse shoes are known for having a narrow fit, especially in the toe box area. If you have wider feet, you may want to consider going up a size to ensure a more comfortable fit. It's always a good idea to try on different sizes and styles to find the one that suits your foot shape the best. 6. Half Sizes and Insoles Converse offers both whole and half sizes for their shoes. If you're in between sizes, it's generally recommended to size down rather than up. Additionally, if you find that your Converse shoes are slightly loose, you can always add insoles for a snugger fit. 7. Breaking In Your Converse Shoes Like any pair of shoes, Converse sneakers may require some breaking in. Initially, they might feel a bit tight or stiff, but as you wear them, they will gradually mold to the shape of your feet. Give them some time, and soon you'll have a pair of comfortable and well-fitted Converse shoes. 8. Kids' Sizing If you're purchasing Converse shoes for children, it's important to note that their sizing can differ from adult sizes. Converse offers specific sizing charts for kids, which can help you determine the right fit for your little one. It's always a good idea to measure their feet and compare it to the sizing chart before making a purchase. 9. International Sizing For those purchasing Converse shoes outside of the United States, it's essential to be aware of international sizing differences. Different countries may have their own unique sizing systems, so it's crucial to refer to Converse's international sizing chart for accurate measurements. 10. Frequently Asked Questions (FAQs) To provide you with even more information, let's address some frequently asked questions about Converse sizing: H1: Are Converse shoes true to size? The answer to this question can vary depending on the individual. While some people find that Converse shoes fit true to size, many recommend sizing down for a better fit. H2: How do I know my Converse shoe size? To determine your Converse shoe size, it's best to measure your feet using a ruler or a measuring tape. Compare your measurements to Converse's sizing chart to find the closest match. H3: Should I buy Converse shoes in my regular shoe size? If you're unsure about your Converse size, it's generally recommended to go down a half or full size from your regular shoe size. H4: Can I return or exchange my Converse shoes if they don't fit? Most retailers have return or exchange policies in place, allowing you to return or exchange your Converse shoes if they don't fit. It's always a good idea to familiarize yourself with the store's policies before making a purchase. 11. Converse Sizing Chart To make your Converse sizing journey easier, here's a helpful chart that you can refer to: [Insert Converse Sizing Chart Image] 12. Conclusion When it comes to Converse sizing, there is no one-size-fits-all answer. The best way to determine your Converse size is to consider factors such as the shoe style, your foot shape and width, and your personal comfort preferences. Remember, it's always better to size down if you're unsure. And don't forget to break in your Converse shoes for the perfect fit. Happy shoe shopping! 13. Additional Resources If you still have questions or need further assistance, here are some additional resources you can check out: - Converse official website: [Insert website URL] - Online shoe forums and communities - Customer reviews and feedback on retailer websites 14. Disclaimer Please note that the information provided in this article is for general guidance purposes only. Sizing can vary depending on personal preferences and foot characteristics. It's always recommended to try on shoes or refer to the specific retailer's sizing chart for the most accurate measurements. 15. Final Thoughts Finding the right size for your Converse shoes doesn't have to be a daunting task. By considering the factors mentioned above and using the provided sizing chart as a guide, you'll be well on your way to rocking a pair of perfectly fitting Converse sneakers. So go ahead, embrace your style, and step into the world of Converse with confidence!


Read More

Crocs Repair Guide How To Mend Broken Crocs Strap

Title: Crocs Repair Guide: How to Mend a Broken Crocs Strap Introduction: Hey there, fellow Crocs enthusiasts! We all know that Crocs are the epitome of comfort and style, but what happens when your beloved pair of Crocs develops a broken strap? Don't fret! In this ultimate Crocs repair guide, we'll walk you through the steps to mend your broken Crocs strap and bring them back to life. So, grab your tools, put on your DIY hat, and let's get started! 1. Assess the Damage: What Type of Breakage Are You Dealing With? Before diving into the repair process, it's crucial to identify the type of breakage your Crocs strap has suffered. There are generally two types: a snapped strap or a detached strap. Understanding the nature of the breakage will help you determine the appropriate repair method. 2. Gather Your Tools: What You'll Need To mend your broken Crocs strap, you'll need a few tools and materials. Don't worry; these are readily available and won't break the bank. Here's what you'll need: - Super glue or adhesive: Look for a strong adhesive suitable for repairing plastic materials. - A small clamp or clothespin: This will help hold the strap in place while the adhesive dries. - A toothpick or small brush: Perfect for applying the adhesive precisely. - Sandpaper or a nail file: To smooth any rough edges after the repair. - Optional: A needle and thread or a sewing machine for additional reinforcement. 3. Fixing a Snapped Crocs Strap If your Crocs strap has snapped completely, don't panic. Follow these steps to mend it: Step 1: Clean the broken ends: Use a damp cloth to wipe away any dirt or debris from the snapped ends. This will ensure a clean surface for the adhesive to bond. Step 2: Apply adhesive: Using a toothpick or small brush, apply a generous amount of adhesive to both broken ends. Make sure to spread it evenly and cover the entire surface area. Step 3: Reattach the strap: Press the broken ends together firmly, aligning them as accurately as possible. Hold them in place for a few minutes to allow the adhesive to set. Step 4: Secure with a clamp: To ensure a strong bond, use a small clamp or clothespin to hold the strap in place while the adhesive dries. Leave it undisturbed for the recommended drying time according to the adhesive instructions. Step 5: Smooth out rough edges: Once the adhesive is completely dry, use sandpaper or a nail file to smooth any rough edges. This will prevent discomfort when wearing your repaired Crocs. 4. Fixing a Detached Crocs Strap If your Crocs strap has detached from the shoe, follow these steps to fix it: Step 1: Clean the surfaces: Wipe both the detached strap and the shoe surface with a damp cloth to remove dirt and debris. This will ensure a clean bonding surface. Step 2: Apply adhesive: Apply adhesive to both the detached strap and the shoe surface. Spread it evenly and cover the entire bonding area. Step 3: Reattach the strap: Press the detached strap firmly onto the shoe surface, aligning it accurately. Apply pressure for a few minutes to allow the adhesive to bond. Step 4: Secure with a clamp: To ensure a secure attachment, use a small clamp or clothespin to hold the strap in place while the adhesive dries. Follow the adhesive instructions for the recommended drying time. Step 5: Reinforce with stitching (optional): For added durability, you can reinforce the repair by sewing the strap to the shoe using a needle and thread or a sewing machine. This step is optional but highly recommended for a long-lasting fix. Conclusion: Congratulations! You've successfully mended your broken Crocs strap and saved yourself from having to buy a new pair. Remember, repairing your Crocs not only saves money but also reduces waste and contributes to a more sustainable lifestyle. So, next time your Crocs need a little TLC, don't hesitate to put on your DIY hat and give them the repair they deserve. Happy repairing, and keep rocking those comfy Crocs!


Read More

Best Polymer Clay Tools For Beginners

Title: Best Polymer Clay Tools For Beginners Introduction: Are you a beginner in the world of polymer clay? Looking to get started with this versatile and creative medium? Well, you're in luck! In this article, we will explore the best polymer clay tools for beginners. These tools will not only help you create stunning clay creations but also make your journey into the world of polymer clay a smooth and enjoyable one. So, let's dive in and discover the essential tools every beginner should have! 1. Polymer Clay: Before we delve into the tools, let's start with the most important ingredient – polymer clay itself. Polymer clay is a type of modeling clay that hardens when baked in an oven. It comes in a variety of vibrant colors and can be easily molded into any shape or form. Choose a high-quality polymer clay brand that suits your needs and preferences. 2. Clay Conditioning Machine: A clay conditioning machine is a must-have tool for beginners. This machine helps soften and condition the clay, making it easier to work with. It ensures that the clay is uniformly mixed and eliminates any air bubbles. Look for a machine with adjustable thickness settings for versatility in your projects. 3. Clay Roller: A clay roller is another essential tool for beginners. It allows you to roll out the clay to your desired thickness. Whether you're creating flat surfaces or textured designs, a clay roller will help you achieve consistent results. Opt for a non-stick roller to prevent the clay from sticking and distorting your creations. 4. Clay Cutters: Clay cutters are handy tools that come in various shapes and sizes. They allow you to create clean and precise shapes in your clay projects. From basic geometric shapes to intricate designs, clay cutters are versatile and perfect for adding details to your creations. Invest in a set of clay cutters to expand your design possibilities. 5. Sculpting Tools: Sculpting tools are indispensable when it comes to shaping and detailing your polymer clay creations. These tools come in a variety of shapes and sizes, such as pointed, rounded, and flat tips. They are perfect for creating textures, carving, and adding intricate details to your clay projects. Experiment with different sculpting tools to find the ones that suit your style. 6. Ball Stylus Tools: Ball stylus tools are excellent for creating indentations, textures, and patterns on your clay surface. They have different-sized balls on either end, allowing you to create various effects. These tools are versatile and can be used to make impressions, add texture to petals, or create intricate designs. They're a must-have for any beginner looking to add depth and dimension to their clay creations. 7. Clay Extruder: A clay extruder is a fantastic tool for creating intricate shapes and designs. It allows you to extrude clay through various interchangeable discs, giving you endless possibilities for your projects. From ropes and strings to intricate patterns, a clay extruder opens up a whole new world of creativity. Start with a basic clay extruder and explore the endless design options it offers. 8. Texture Sheets: Texture sheets are a beginner's best friend when it comes to adding texture and patterns to polymer clay. These sheets come in a variety of designs, such as floral, geometric, and abstract patterns. Simply press the texture sheet onto the clay surface to transfer the design. Texture sheets are an easy way to add depth and interest to your clay creations without much effort. 9. Acrylic Roller: An acrylic roller is a versatile tool that can be used for various techniques in polymer clay projects. It helps smooth out the clay surface, blend colors, and create unique effects. Additionally, an acrylic roller is perfect for creating a smooth finish on your clay creations. It's a handy tool that every beginner should have in their toolkit. 10. Work Surface: Having a dedicated work surface is essential for working with polymer clay. It can be a non-stick mat, a glass surface, or even a ceramic tile. A smooth and clean work surface prevents the clay from sticking and allows you to easily move and manipulate your creations. Invest in a dedicated work surface to ensure a hassle-free clay crafting experience. 11. Storage Containers: As a beginner, it's crucial to keep your polymer clay and tools organized. Invest in storage containers to keep your clay colors separate and prevent them from drying out. Additionally, having separate containers for your tools will help you stay organized and save time during your creative process. Keep your workspace tidy and efficient with proper storage containers. 12. Oven Thermometer: Baking polymer clay requires precise temperature control to achieve the best results. An oven thermometer is a handy tool that ensures your oven is at the correct temperature. It helps prevent under or over baking, which can affect the durability and appearance of your clay creations. Invest in an oven thermometer for consistent and reliable results. 13. Sandpaper: Sandpaper is a useful tool for refining and smoothing the edges of your clay creations. It helps remove any rough spots or imperfections, giving your projects a polished finish. Different grits of sandpaper can be used for various stages of sanding, from coarse to fine. Sandpaper is an essential tool for achieving a professional look in your polymer clay projects. 14. Varnish: To protect and enhance the appearance of your finished polymer clay creations, a varnish is a must-have. Varnish adds a glossy or matte finish to your projects, making them more durable and resistant to wear and tear. Choose a varnish specifically made for polymer clay to ensure compatibility and long-lasting results. 15. Inspiration and Creativity: Last but not least, the most important tool for any beginner is inspiration and creativity. Let your imagination run wild and explore different techniques and ideas. Experiment with colors, textures, and shapes to create unique and personal clay creations. Remember, the best tools are useless without the spark of creativity that brings your clay projects to life! Conclusion: As a beginner in the world of polymer clay, having the right tools can make all the difference in your creative journey. From clay conditioning machines to sculpting tools, each tool serves a specific purpose and enhances your clay crafting experience. Remember to invest in high-quality tools and materials to ensure the best results. So, gather your tools, unleash your creativity, and embark on an exciting adventure with polymer clay!


Read More

Can You Wear Summer Dresses To Work

Title: Can You Wear Summer Dresses To Work Introduction: Summer is here, and with it comes the desire to wear breezy and comfortable outfits. But what about wearing summer dresses to work? Can you pull off that chic and effortless look while still maintaining a professional appearance? In this article, we will explore the dos and don'ts of wearing summer dresses to work, providing you with practical tips and style inspiration to help you navigate this sartorial challenge. Heading 1: Embracing the Summer Vibes Summer is a time for embracing light and airy fashion choices, and dresses are the epitome of summer style. The question is, can you bring that summer vibe into the workplace without compromising professionalism? The answer is yes, but it requires careful consideration of the dress code and some smart styling choices. Heading 2: Understanding Your Workplace Dress Code Before you start incorporating summer dresses into your work wardrobe, it's essential to understand your company's dress code policy. Some workplaces have strict guidelines, while others may have a more relaxed approach. Familiarize yourself with the rules and regulations to ensure you stay within the boundaries of what is deemed appropriate. Heading 3: Dressing Up or Dressing Down The key to wearing summer dresses to work is finding the right balance between dressing up and dressing down. Opt for dresses that have a polished and sophisticated feel, rather than those that are too casual or revealing. Look for dresses made from quality fabrics with tailored cuts that flatter your body shape. Heading 4: Length Matters When it comes to wearing summer dresses to work, the length of the dress is crucial. Aim for dresses that fall at or slightly above the knee. This length is generally considered appropriate for most workplaces. Avoid dresses that are too short or too long, as they can either appear too casual or overly formal. Heading 5: Choosing the Right Fabric The fabric of your summer dress plays a significant role in its suitability for the workplace. Opt for breathable fabrics like cotton, linen, or lightweight blends. These materials not only keep you cool during hot summer days but also exude a professional and put-together look. Heading 6: Colors and Patterns Summer dresses often come in vibrant colors and playful patterns, but it's important to choose wisely for the office. Stick to more subdued shades like pastels, neutrals, or classic black. If you want to incorporate patterns, opt for subtle prints or delicate florals that add a touch of personality without being overpowering. Heading 7: Layering for Professionalism Layering is an excellent way to make your summer dress more office-appropriate. Pair it with a tailored blazer or a lightweight cardigan to add structure and polish to your look. This not only elevates the dress but also allows you to adjust your outfit to the temperature of your workplace. Heading 8: Accessorizing with Finesse Accessories can make or break an outfit, and when it comes to wearing summer dresses to work, they play a crucial role. Choose accessories that are understated and complement your dress. Opt for classic pieces like a statement necklace, simple earrings, or a structured handbag. Avoid overly flashy or casual accessories that may detract from the professional vibe. Heading 9: Footwear Choices The choice of footwear can significantly impact the overall look of your summer dress. Opt for closed-toe shoes or sandals with a modest heel for a more professional appearance. Avoid flip-flops, athletic shoes, or anything too casual. Remember, your shoes should match the level of formality required by your workplace. Heading 10: Grooming and Personal Care To complete your summer dress look, pay attention to grooming and personal care. Ensure your hair is neat and styled appropriately for the workplace. Keep your makeup natural and fresh, avoiding heavy or dramatic looks. Maintaining good personal hygiene and grooming habits is essential to projecting a professional image. Heading 11: Confidence is Key No matter how well you adhere to the dress code and style your summer dress, confidence is the ultimate accessory. Wear your dress with pride, knowing that you have made a conscious effort to look professional while embracing the summer season. Confidence will radiate from within and enhance your overall appearance. Heading 12: Style Inspiration Need some style inspiration for wearing summer dresses to work? Here are a few outfit ideas to get you started: 1. A knee-length, sleeveless sheath dress in a muted color, paired with a tailored blazer and closed-toe pumps. 2. A lightweight, floral wrap dress with a modest neckline, paired with a cardigan and wedge sandals. 3. A linen shirt dress in a neutral shade, cinched at the waist with a belt, and paired with loafers or ballet flats. Heading 13: Breaking the Rules (Sometimes) While it's important to adhere to your workplace dress code, there may be occasions where you can bend the rules slightly. Casual Fridays or company outings may allow for more relaxed summer dress choices. However, always use your judgment and ensure your outfit remains appropriate for the occasion. Heading 14: Conclusion Wearing summer dresses to work is indeed possible, as long as you understand your workplace dress code and make smart styling choices. By opting for dresses with a polished feel, appropriate length, and professional fabrics, you can embrace the summer vibes while maintaining a professional appearance. Remember to layer, accessorize, and groom yourself with care, and most importantly, wear your outfit with confidence. Heading 15: FAQs 1. Can I wear a maxi dress to work? While maxi dresses can be stylish and comfortable for summer, they are generally considered too casual for most workplaces. Stick to knee-length or slightly above the knee dresses for a more professional look. 2. Are sleeveless dresses appropriate for the office? Sleeveless dresses can be appropriate for the office if the neckline is modest and the overall look is polished. Layering with a cardigan or blazer can also help make the dress more office-appropriate. 3. Can I wear sandals with my summer dress? Sandals can be worn with summer dresses to work, as long as they have a modest heel and a polished appearance. Avoid flip-flops or anything too casual. 4. How can I add a touch of personality to my summer dress? You can add personality to your summer dress through subtle patterns, delicate accessories, or a pop of color in your shoes or handbag. Just remember to keep it tasteful and professional. 5. Can I wear a sundress to the office? Sundresses are generally too casual for the office. Opt for dresses with more structure and tailored cuts for a professional look. In conclusion, wearing summer dresses to work is possible with some thoughtful consideration. By understanding your workplace dress code, choosing the right length, fabric, and colors, and accessorizing with finesse, you can create a professional yet summer-appropriate outfit. Remember to stay confident and embrace your personal style while respecting the guidelines of your workplace.


Read More

How Much Does It Cost To Make Polymer Clay Earrings

Title: How Much Does It Cost To Make Polymer Clay Earrings? Introduction: Have you ever been captivated by the beauty of polymer clay earrings and wondered if you could make them yourself? Polymer clay earrings have gained immense popularity in recent years due to their versatility and unique designs. Not only are they a great way to express your personal style, but they can also be a fun and creative DIY project. In this article, we will explore the cost factors involved in making polymer clay earrings, helping you understand the expenses and make informed decisions. So, grab your creativity and let's dive in! 1. Gathering the Materials: Unleash Your Inner Artist Before we dive into the cost breakdown, let's take a quick look at the materials you'll need to get started. Creating polymer clay earrings requires a few essential items, such as polymer clay, earring hooks, jump rings, pliers, and baking supplies. These materials can be easily found at craft stores or online retailers. Depending on your personal preferences, you can choose from a wide range of colors, patterns, and textures of polymer clay, allowing your imagination to run wild. 2. Cost of Polymer Clay: Polymer clay is the primary material used in making earrings. It is available in various brands and qualities, each with its own price range. Generally, a block of polymer clay can cost anywhere between $1 to $5, depending on the brand and size. High-quality clay may be slightly more expensive, but it often offers better results and durability. 3. Additional Materials: Apart from polymer clay, you will also need earring hooks, jump rings, and pliers. Earring hooks are available in different materials like stainless steel, silver, or gold-plated, and their prices can range from $2 to $10 for a pack. Jump rings, used to connect the clay piece to the earring hook, are inexpensive and can be found for as low as $1 for a pack. Pliers, used for opening and closing jump rings, can be purchased for around $5 to $10. 4. Baking Supplies: To cure the polymer clay and make it hard, you will need an oven or a dedicated toaster oven. Most polymer clays require baking at specific temperatures for a certain duration. If you already have an oven at home, there won't be any additional cost. However, if you plan to invest in a toaster oven solely for polymer clay projects, they can range anywhere from $30 to $100, depending on the brand and features. 5. Tools and Accessories: While not essential, various tools and accessories can enhance your polymer clay earring making experience. These include clay cutters, texture plates, molds, and sandpaper. Prices for these tools can vary depending on the brand and quality, ranging from $5 to $20 each. Investing in these tools can offer more design possibilities and help you create intricate and unique earrings. 6. Time Investment: While we've covered the monetary costs, it's important to consider the time investment required to create polymer clay earrings. The process involves conditioning the clay, shaping it into desired designs, baking, and assembling the earrings. The time required can vary depending on your skill level, design complexity, and the number of earrings you plan to make. Remember, the more time you invest, the better your skills will become, resulting in more professional-looking earrings. 7. Cost Comparison: DIY vs. Buying Now that we have a better understanding of the materials and associated costs, let's compare the cost of making polymer clay earrings yourself versus buying them from a store. While handmade earrings offer a personal touch and the ability to customize designs, they may not always be the most cost-effective option. Store-bought polymer clay earrings can range from $10 to $50, depending on the brand and design complexity. On the other hand, making your own earrings can significantly reduce costs, especially if you plan to create multiple pairs. 8. Factors Affecting Cost: Several factors can influence the overall cost of making polymer clay earrings. These include the quality and brand of materials, the complexity of designs, the number of earrings you plan to make, and any additional tools or accessories you choose to invest in. By carefully considering these factors, you can tailor your expenses to fit your budget and creative aspirations. 9. Selling Your Creations: If you've mastered the art of making polymer clay earrings, you might even consider selling them. This can help offset the costs involved and turn your hobby into a small business venture. Many online platforms, such as Etsy, provide a marketplace for handmade items, allowing you to reach a wide customer base. However, keep in mind that selling handmade products involves additional costs, such as packaging, shipping, and marketing. Conclusion: Making polymer clay earrings can be a rewarding and cost-effective way to express your creativity. By understanding the various cost factors involved, you can plan your budget accordingly and enjoy the process of designing and crafting unique earrings. Remember, the cost of making polymer clay earrings is not just limited to monetary expenses but also includes the time and effort you invest. So, unleash your inner artist, experiment with different designs, and let your imagination shine through your beautiful creations!


Read More

How To Attach Stud Backs To Polymer Clay Earrings

Title: How To Attach Stud Backs To Polymer Clay Earrings Introduction: Have you ever admired those cute and colorful polymer clay earrings but wondered how to attach stud backs to them? Well, you're in luck! In this article, we'll guide you through the process step by step, so you can create your own stunning earrings that are both stylish and secure. Get ready to dive into the world of polymer clay and unleash your creativity! 1. Gather Your Materials Before you begin, make sure you have all the necessary materials at hand. You'll need: - Polymer clay in your desired colors - Stud backs - Earring posts - E6000 adhesive or a strong jewelry glue - A small rolling pin or a smooth glass bottle - An oven for baking the clay - A baking sheet or parchment paper 2. Prepare Your Workspace Creating polymer clay earrings can get a little messy, so it's important to set up a clean and organized workspace. Lay down some parchment paper or a non-stick surface to prevent the clay from sticking to your table. Have a damp cloth nearby to clean your hands and tools as needed. 3. Condition and Shape the Clay Polymer clay needs to be conditioned before use to make it soft and pliable. Start by kneading a small piece of clay in your hands until it becomes smooth and easy to work with. If the clay is too hard, you can warm it up by rolling it between your palms or using a hairdryer on low heat. 4. Create Your Earring Design Let your creativity run wild as you shape the clay into your desired earring design. Whether you prefer simple geometric shapes or intricate patterns, the possibilities are endless. Use your hands or various tools like toothpicks or clay cutters to shape and texture the clay. 5. Make Holes for Stud Backs To attach the stud backs, you'll need to create small holes in the clay where the earring posts will go. Gently press the stud backs into the clay to create an indentation. Make sure the holes are deep enough to securely hold the stud backs but not too deep that they poke through the other side. 6. Bake the Clay Once you're satisfied with your design and the stud back holes, it's time to bake the clay. Follow the instructions on your clay packaging for the correct baking temperature and time. Place your earrings on a baking sheet or parchment paper and carefully transfer them to the oven. Keep an eye on them to prevent over-baking. 7. Let the Clay Cool After baking, remove the earrings from the oven and let them cool completely. Polymer clay can be fragile when it's hot, so be patient and allow them to cool down before handling them. 8. Attach the Stud Backs Once the earrings have cooled, it's time to attach the stud backs. Apply a small amount of E6000 adhesive or a strong jewelry glue to the back of the stud backs and carefully press them into the holes you created earlier. Make sure they are securely attached and aligned with your design. 9. Let It Cure To ensure a strong bond between the clay and the stud backs, let the earrings cure for at least 24 hours. This will allow the adhesive to fully set and provide a secure attachment. 10. Finishing Touches Now that your stud backs are securely attached, you can add any finishing touches you desire. You can paint the clay with acrylic paints, add glitter, or even apply a layer of clear varnish to give your earrings a glossy finish. Let your creativity shine! 11. Safety Tips When working with polymer clay and adhesives, it's essential to prioritize safety. Make sure to work in a well-ventilated area and avoid inhaling any fumes from the clay or glue. If you have sensitive skin, consider wearing gloves while handling the clay to prevent any potential skin irritation. 12. Maintenance and Care Polymer clay earrings are durable, but they still require proper care to maintain their beauty. Avoid exposing them to excessive heat or moisture, as this can cause the clay to warp or lose its shape. Gently wipe them with a soft cloth to remove any dirt or oils that may accumulate over time. 13. Experiment and Have Fun! Now that you know how to attach stud backs to polymer clay earrings, don't be afraid to experiment and try new designs. Mix different colors, textures, and shapes to create unique pieces that reflect your personal style. The possibilities are endless, so let your imagination soar! 14. Share Your Creations Once you've mastered the art of attaching stud backs to polymer clay earrings, don't forget to share your creations with the world. Post your designs on social media, gift them to friends and family, or even consider selling them online. Your handmade earrings are sure to turn heads and spark conversations. 15. Conclusion Attaching stud backs to polymer clay earrings is a fun and rewarding process that allows you to express your creativity. By following these steps and letting your imagination run wild, you'll be able to create stunning earrings that are not only stylish but also securely attached. So, gather your materials, set up your workspace, and let the clay do the talking. Happy crafting!


Read More